
Today most new laptops have FullHD screen resolution, and 4K resolution is quickly gaining popularity. FullHD has 2200 pixels on a diagonal line, so a 15” screen has 146 pixels (or dots) per inch (PPI or DPI). This is way more than the default 96 DPI in Windows, so modern versions of Windows can enable screen scaling automatically, without a user request. No matter what your attitude to screen scaling as a programmer, sooner or later your users will demand support of this technology from your apps. But it is also true that screen scaling is quite a complex thing to understand and implement. To better understand how it has been implemented in Windows, let’s look at its evolution over time.
On June 7, 2010, Apple released iPhone 4 with a revolutionary Retina display. Soon after that other manufacturers of smartphones started to use screens with high pixel/dot density per inch (HiDPI). It looks like until recent times, everybody has been using such screens, except PCs. But this is not entirely true. Even Windows XP could use HiDPI displays to some extent if the user had one. Of course, the OS itself had only basic support. Most of the work, related to UI scaling, had to be done by application developers and user interface (UI) frameworks. Every next version of Windows had some improvements for HiDPI screens. New APIs have been added, and some old ones have got different modes of operation. In the latest versions of Windows HiDPI related APIs have become big and complex, in comparison to other sets of APIs. In this series of articles we will make a quick tour over the most important things a RAD Studio developer should know about screen scaling in Windows.
In the first implementation of HiDPI support in Windows users had to manually set an amount of dots per inch on a screen in the Control Panel. It did not really depend on connected monitors or screens, so on all screens UI scaled the same way. The reason for that is probably that, back in the day, very few monitors and screens had support for Extended Display Identification Data (EDID), so Windows simply could not know their physical dimensions and could not calculate suitable DPI value. This actually made the creation of apps with HiDPI support relatively easy, because the current DPI had to be set during application startup, and could not change until the next OS reboot. In Windows 8 Microsoft developers decided to add support for screens with different DPI. This means that an app could be started on a screen with one DPI value, later moved to a screen with another DPI value, and had to dynamically scale its UI size.
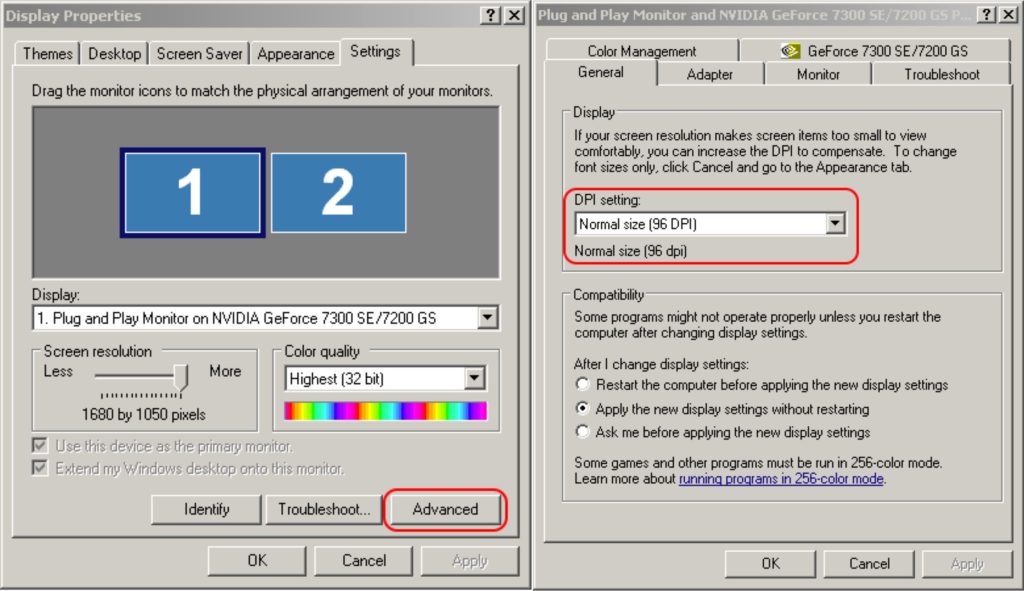
HiDPI settings in Windows XP
Scaling changes are applied after reboot.
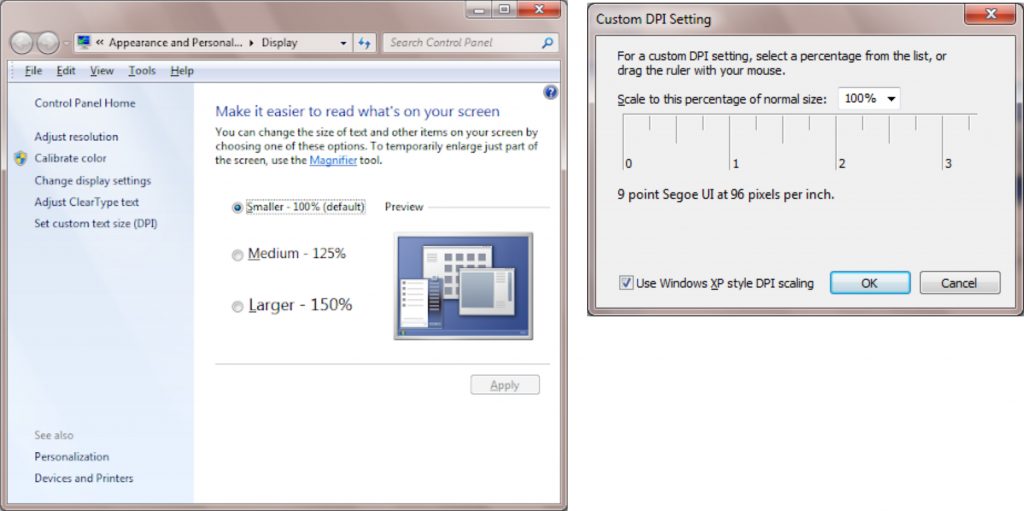
HiDPI settings in Windows 7 (and Vista)
Checkbox “Use Windows XP style DPI scaling” is used to control DPI virtualization, we will talk about it in a next article
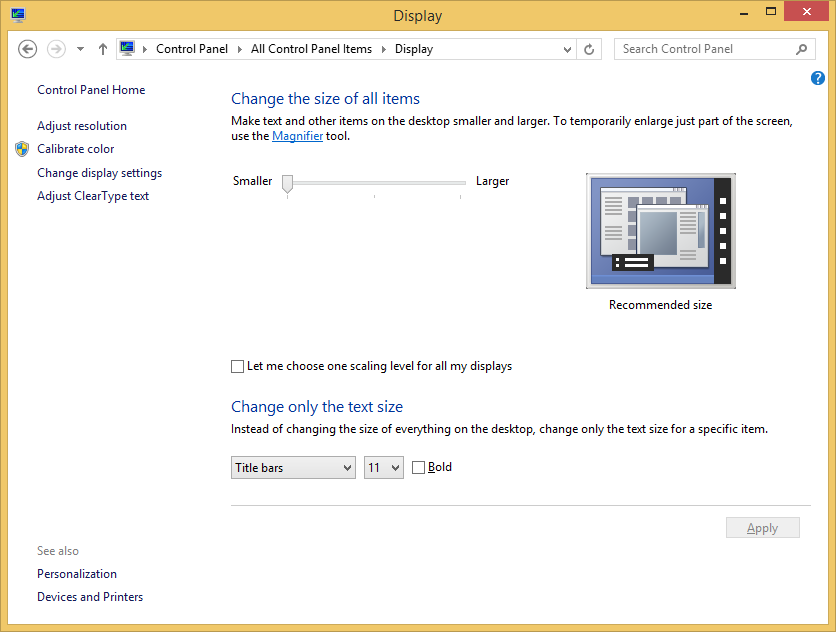
HiDPI Settings in Windows 8.1
You can decide to make everything slightly bigger or smaller,
and Windows will calculate individual DPI for every screen based on its EDID
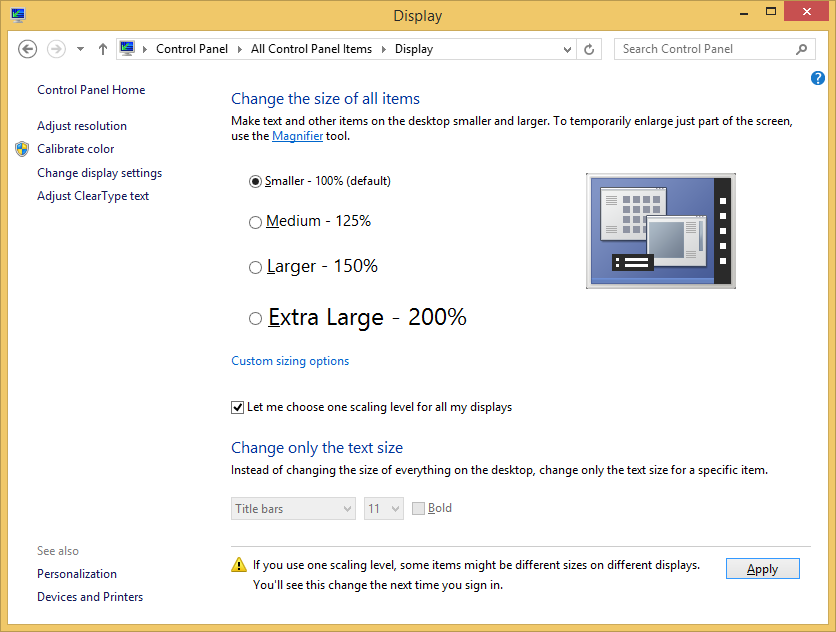
Alternate mode allows to fine tune scaling, but it will be the same for every screen, like in Windows 7
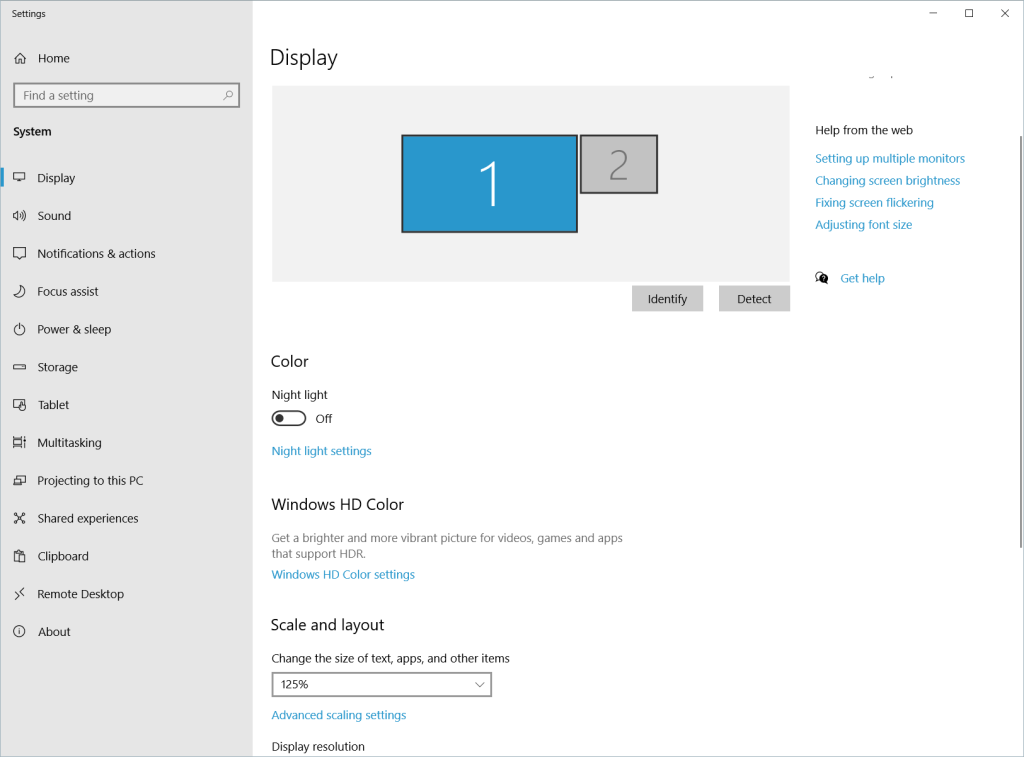
HiDPI Settings in Windows 10
Now the scale can be set separately for every screen.
The currently selected screen is marked blue. Advanced scaling settings allow setting one scaling for entire system, like in Windows 7
Now you are, probably, asking yourself: what if an application developer did not implement support for HiDPI, or it even wasn’t a thing, when the app was written? How will Windows know that, and how will it behave? We will answer that question in our next article about Application Manifests.